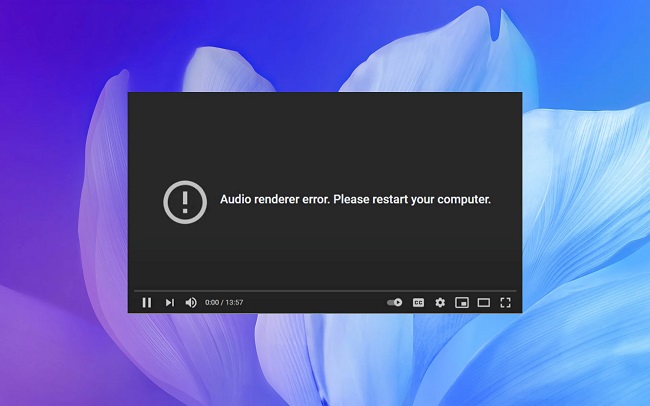
An “Audio renderer error” has been reported by several Windows users. When trying to play a YouTube video, the message “Please restart your computer.” appears.
Chrome, Opera, Edge, and Mozilla Firefox, among others, have all reported experiencing this problem, and it does not appear to be Windows-version specific. This problem has been reported by other users even when using the built-in audio player or iTunes.
Ways to Fix YouTube Audio Renderer Error

Clearing your browser’s cache or reconnecting your headphones may fix the problem. It’s also possible that the issue is more fundamental, stemming from hardware, device drivers, or incompatibilities between different programs on your computer.
Most Windows-based web browsers have been reported to be affected by this issue. Here’s what you need to do if you’re experiencing problems with the YouTube audio renderer.
Read Also:
Method 1: Restart Your Computer
If you’re using Windows, restarting the system is the next step you may take to see if that resolves the issue. The audio message could have been triggered by a momentary problem with your device drivers.
Just restarting your computer will allow it to reload all of the system resources, which may solve the problem. Have a look at the detailed instructions down below.
Step 1: Open Windows by clicking the Windows icon in your computer’s bottom left corner.
Step 2: Navigate the menu by clicking the power button.
Step 3: Select the Restart button to start the rebooting process.
After the reboot is complete, open your browser and try watching another video from YouTube to see if the problem persists.
Method 2: Run Windows Audio Troubleshooter
Many Windows audio-related issues can be resolved with the use of a built-in utility. Below you will find a detailed guide on how to use the Windows Audio Troubleshooter.
Step 1: To begin, press the Windows key plus R to bring up the Run dialog box.
Step 2: Next, press the Enter key once more and then type ms-settings: troubleshoot.
Step 3: After that, go to the Troubleshoot menu and select Playing Audio from the list of options.
Step 4: Select Run the Troubleshooter and then adhere to the on-screen directions to use the tool.
If the troubleshooter detects any issues and provides a solution, you may implement it by selecting Apply this Repair once the scan is complete. Let’s say, though, that even though the Audio Troubleshooter found no issues, you’re still unable to play movies on your browser. If that’s the case, read on for a potential solution to the problem.
Method 3: Restart Your Audio Driver
If the audio renderer error persists, restarting your audio drivers is the next step you may do. It’s conceivable that an issue with your driver software has rendered your audio renderer inoperable.
To solve this, try turning off and then back on your audio drivers. If you want to know how to do it, just stick to the instructions below.
Step 1: To open the Device Manager, use the Windows Key + S.
Step 2: Then, after selecting Open, the Device Management window will open.
Step 3: Click the expand button next to “Audio Inputs and Outputs” in Device Manager.
Step 4: Finally, with the right mouse button, select “Disable Device” next to your audio driver.
The audio driver can be enabled again by right-clicking on it and selecting the option to do so. The next step is to restart your computer and see if the audio renderer error warning still appears when you visit YouTube using a different web browser.
Method 4: Reinstall Your Audio Driver
Just restarting your computer won’t help if the audio drivers weren’t installed correctly or are corrupt. But, reinstalling the driver may guarantee that the audio is properly installed and functioning. The following are instructions for reinstalling your audio drivers.
Step 1: One must first open the Device Manager by pressing the Windows Key + S.
Step 2: Then, after selecting Open, the Device Management window will open.
Step 3: Open the submenu labeled “Audio Inputs and Outputs” by clicking on it.
Step 4: Pick Remove Device from the context menu when you right-click on your audio drives. To uninstall the driver completely, follow the on-screen instructions.
Read Also:
Conclusion
While watching a video on YouTube on your browser, you may get the Audio renderer error. It’s annoying because suddenly your video won’t play. Fortunately, fixing the Audio renderer problem is simple. In order to solve the issue permanently, just follow our guide.
A user will receive the following notification whenever the audio renderer has an error: “Problems rendering the audio. A request for a computer restart is in order “atop a black screen on YouTube.
Because of this, you can’t play videos, and the device will need to reset immediately. There could be a number of things in the way of you making the obvious correction, such as ongoing tasks, downloads, or too many pressing tabs open at once.
You may have previously tried restarting the computer, but that may not have helped.

